Just like any other host on your network, it is critical to stay up-to-date with the latest packages on your perfSONAR Toolkit. You will want to make sure you have the latest security fixes as well as the ability to take advantage of the great new features constantly being added to the tools. In general you will keep your host up-to-date with the operating system’s package manager (e.g. yum), but in some special cases things may be more involved. Be sure to watch release notes and this page when such cases arise.
Anytime you want to manually update your host, simply run the following:
yum update
The yum package manager is used by RedHat-based operating systems like CentOS to update packages. Running the command above will download the latest perfSONAR packages as well as any operating system packages available.
Note
The Toolkit runs a Web100 patched version of the kernel. In some cases CentOS may release a new kernel before the perfSONAR development team has had a chance to create and test a patched version. This will cause an unpatched version to be downloaded, thus disabling the tools NDT and NPAD that rely on the patch. For some users that do not leverage these tools this may not be a concern. Please see our FAQ for more details.
Note
Automatic updates are enabled by default starting in version 3.4 of the perfSONAR Toolkit.
You may choose to enable automatic updates to aid in applying the latest software packages to your system. Automatic updates include all perfSONAR, operating system and third-party packages. Enabling this feature will help keep the latest security fixes on the system, but keep in mind it is possible some updates may break your host unexpectedly. Specifically kernel updates may break NDT and NPAD if a non-web100 version is applied. See this FAQ for more information. The following rule of thumb from Fedora may be useful when considering whether to enable this feature:
If the machine is a critical server, for which unplanned downtime of a service on the machine can not be tolerated, then you should not use automatic updates. Otherwise, you may choose to use them.
It is also important to note that automatic updates do not perform all required system reboots or service restarts. Also, auto-updates happen nightly so there may be a period of up to 24 hours where you do not receive a patch. Enabling this feature still requires close monitoring of the host to make sure all updates are applied completely and properly.
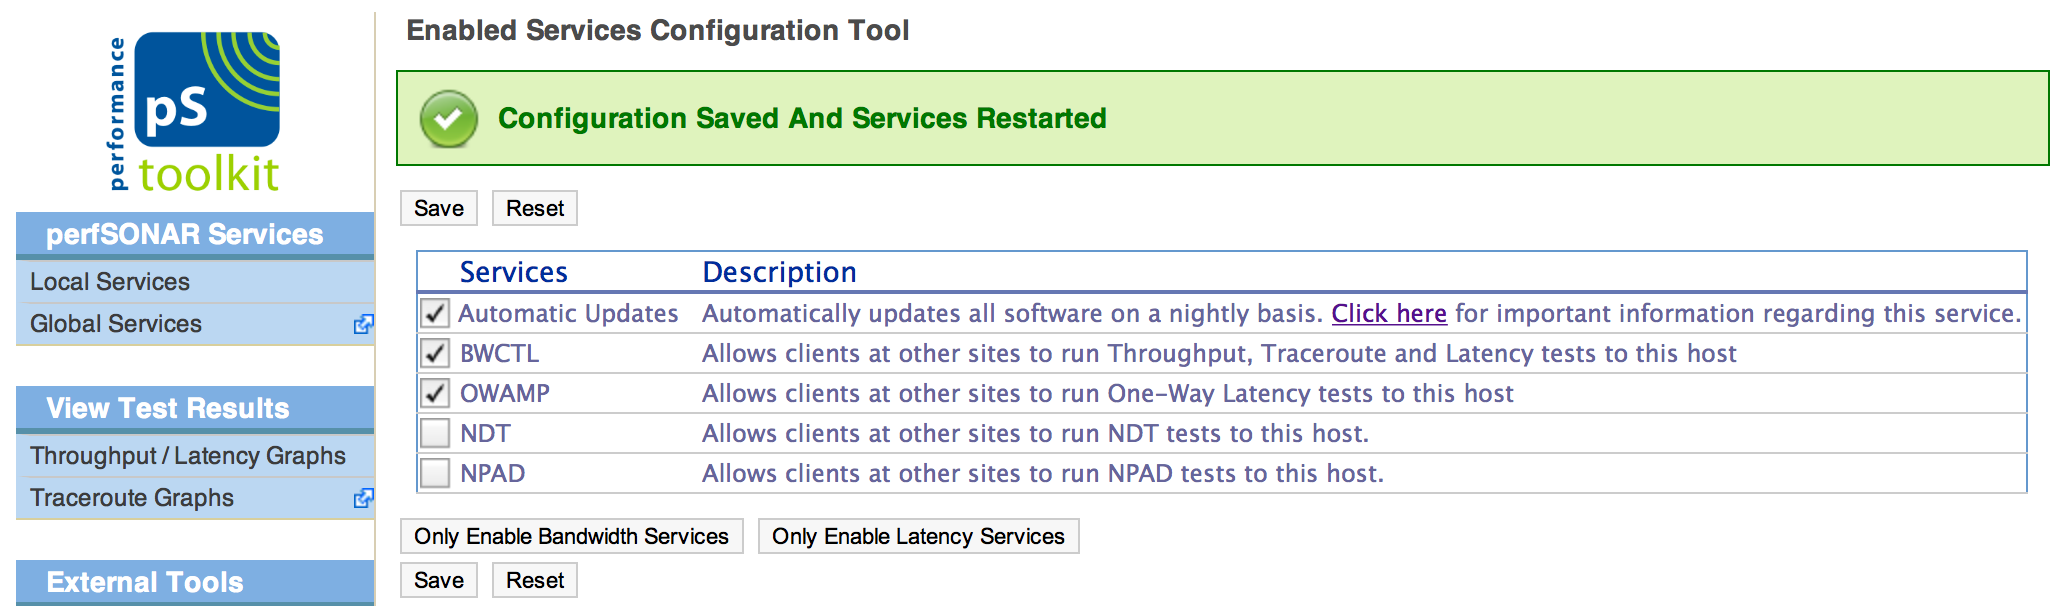
You may enable/disable automatic updates from the web interface as follows:
Open your toolkit web interface in a browser
Click on Enabled Services in the left-hand menu
Login using the web administrator username and password.
See also
See Managing Users for more details on creating a web administrator account
On the page that loads check the box next to Automatic Updates to enable them or uncheck it to disable them
Click Save to apply your changes
After a loading screen you should see a message indicating the services have been successfully restarted and the new configuration has been applied.
Alternatively, you may enable them from the command-line with the following commands (must be run as a root user):
/sbin/chkconfig --add yum-cron
/sbin/chkconfig yum-cron on
/sbin/service yum-cron start
Likewise, you may disable auto-updates from the command-line by running:
/sbin/service yum-cron stop
/sbin/chkconfig yum-cron off
Also note that the main configuration file for auto-updates lives at /etc/sysconfig/yum-cron. See the yum-cron man page or the page here for more information on using auto-updates and advanced options like excluding packages from updates.
Starting in 3.4, the LiveCD and LiveUSB distributions are no longer provided. If you do not wish to keep any existing data you may ignore this section and do a normal clean installation. For existing users of the LiveCD wishing to migrate their data to the latest distribution see the steps below:
Login in to your 3.3.2 LiveCD/LiveUSB via SSH or the terminal
Run the command below to create a backup of all relevant files in ~/ps-toolkit-livecd-backup.tgz
/opt/perfsonar_ps/toolkit/scripts/ps-toolkit-migrate-backup.sh ~/ps-toolkit-livecd-backup.tgz
Copy the backup file ~/ps-toolkit-livecd-backup.tgz from your LiveCD/LiveUSB host to a safe location. We will need to copy this to our new installation later. If you will be overwriting the LiveCD/LiveUSB with the new installation, make sure this file is stored safely on another system, so it can be copied to the new installation later.
Logout of the LiveCD/LiveUSB host
Perform a clean installation of the Toolkit using the latest released version. See Choosing an Installation Method for help choosing the right distribution and pointers to installation instructions. You may choose to install on the existing LiveCD/LiveUSB hardware or a completely new host. If it is the former, make sure you have downloaded your LiveCD/LiveUSB backup file to a safe location.
Copy the file ~/ps-toolkit-livecd-backup.tgz from the location chosen in step 3 to your new system. The exact command to do this will depend on where you placed the file (e.g. use scp).
Login to your new installation via SSH or the terminal
Run the following commands to create a few databases and directories to hold the old LiveCD/LiveUSB data:
mkdir -p /opt/perfsonar_ps/perfsonarbuoy_ma/etc
mysql -u root -e "CREATE DATABASE owamp"
mysql -u root -e "CREATE DATABASE bwctl"
mysql -u root -e "CREATE DATABASE traceroute_ma"
mysql -u root -e "CREATE DATABASE pingerMA"
mysql -u root -e "CREATE DATABASE cacti"
Run the command below to restore your data:
/opt/perfsonar_ps/toolkit/scripts/ps-toolkit-migrate-restore.sh ~/ps-toolkit-livecd-backup.tgz
Run the command below to re-install the toolkit which should apply any required updates to the transfered configuration files:
yum reinstall perl-perfSONAR_PS-Toolkit
Reboot your host:
reboot
Your host should now be migrated.
Note
After the reboot, it still may take many hours to migrate all historical OWAMP, BWCTL and traceroute data to the new measurement archive so please be patient. You may look in /var/log/perfsonar/psb_to_esmond.log for information on the progress of the migration.
Note that updates from versions older than 3.3 are not currently supported. You will need to do a clean installation if you wish to move to a newer version.
When upgrading from version 3.3 to 3.4, your archived BWCTL, OWAMP and traceroute data will automatically be migrated to the new measurement archive introduced in that version. This may take many hours depending on the amount of historical data on your system. See /var/log/perfsonar_ps/psb_to_esmond.log for logs and progress on the conversion. If you do not wish to convert data you may discard all old data with the following:
mysql -u root -e "DROP DATABASE owamp"
mysql -u root -e "DROP DATABASE bwctl"
mysql -u root -e "DROP DATABASE traceroute_ma"
When you upgrade from a version of the software older than 3.4, automatic updates will be enabled for you. See the previous section in this document for information on implications and how to disable them if desired.
When you upgrade from a version of the software older than version 3.4, you may be asked to create a new user to login to the web interface. This is because any user in wheel (e.g. root) is no longer allowed to access the web interface. Given this new constraint, if none of your existing users can login to the web interface you will be prompted to create a new one the first time you login as root. See Managing Users for more information.