The Toolkit allows you to enter contact and location information about the host. This information will not only display on the main page but will be published in the perfSONAR Lookup Service allowing other testers to find your host. This page contains information on editing this information through the web interface.
Open http://<hostname> in your browser where <hostname> is the name of your toolkit host
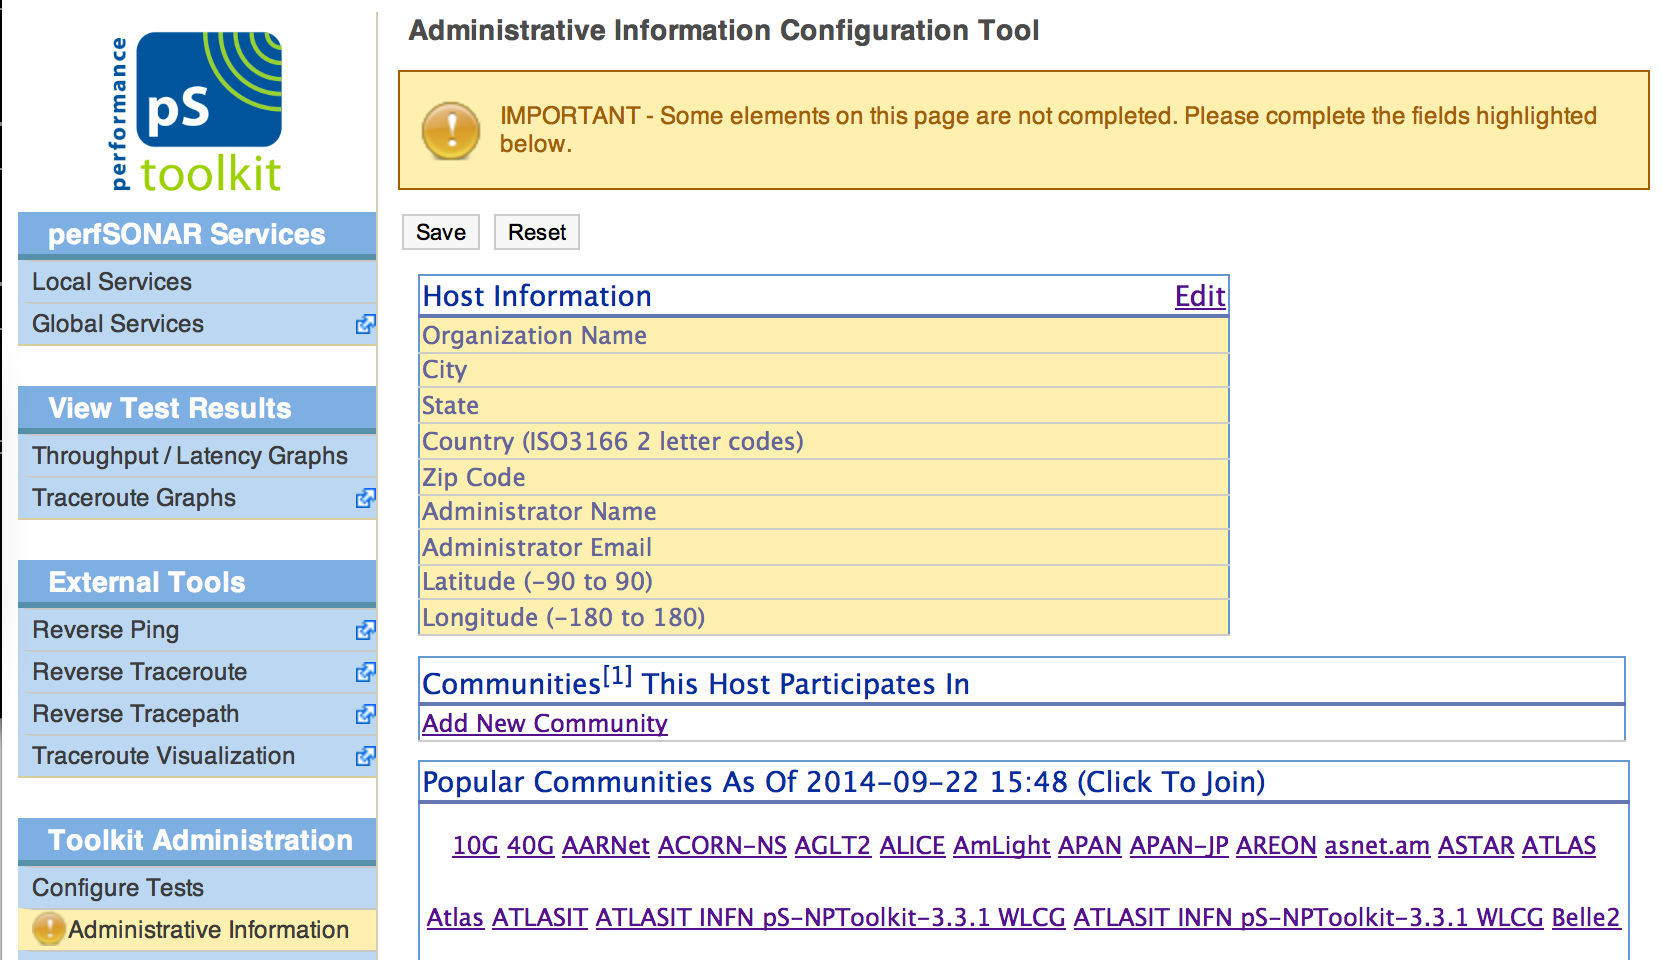
Click on Administrative Information in the left-hand menu

Note
The link will only be yellow if you have not filled in all the administrative information previously. It may appear as blue if you have already done so.
See also
See Managing Users for more details on creating a web administrator account
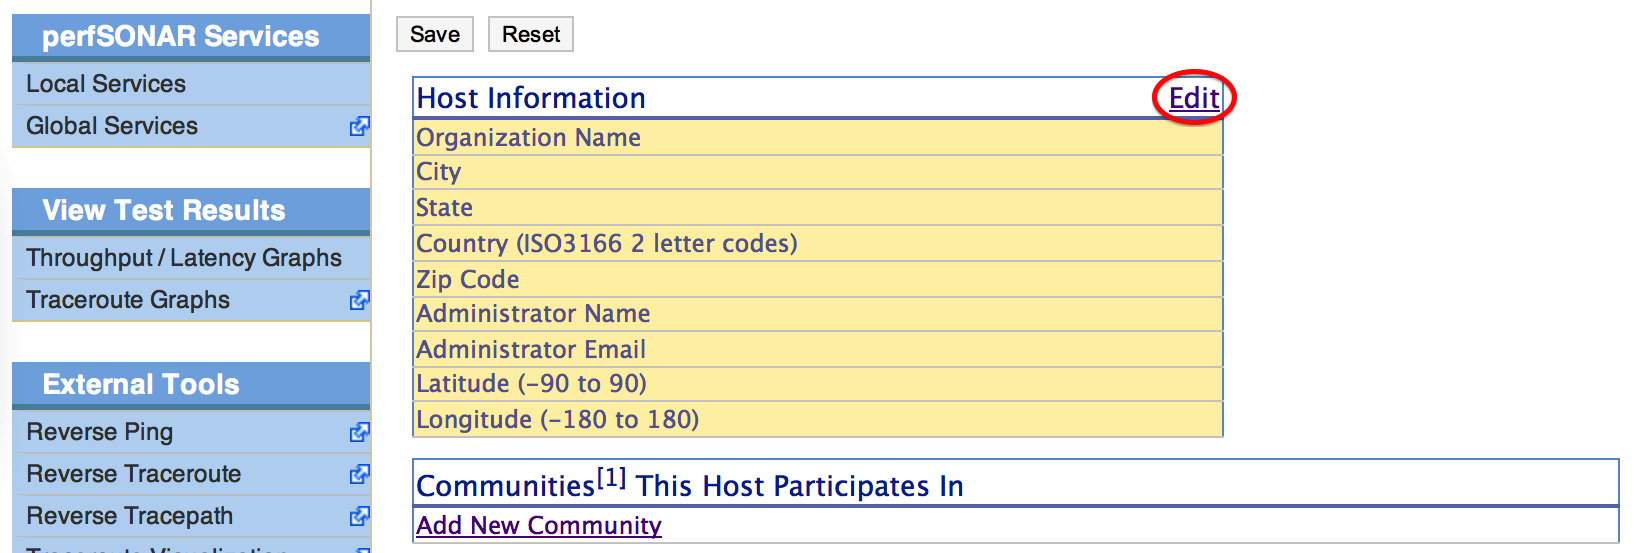
On the Administrative Info page click Edit next to the Host Information heading
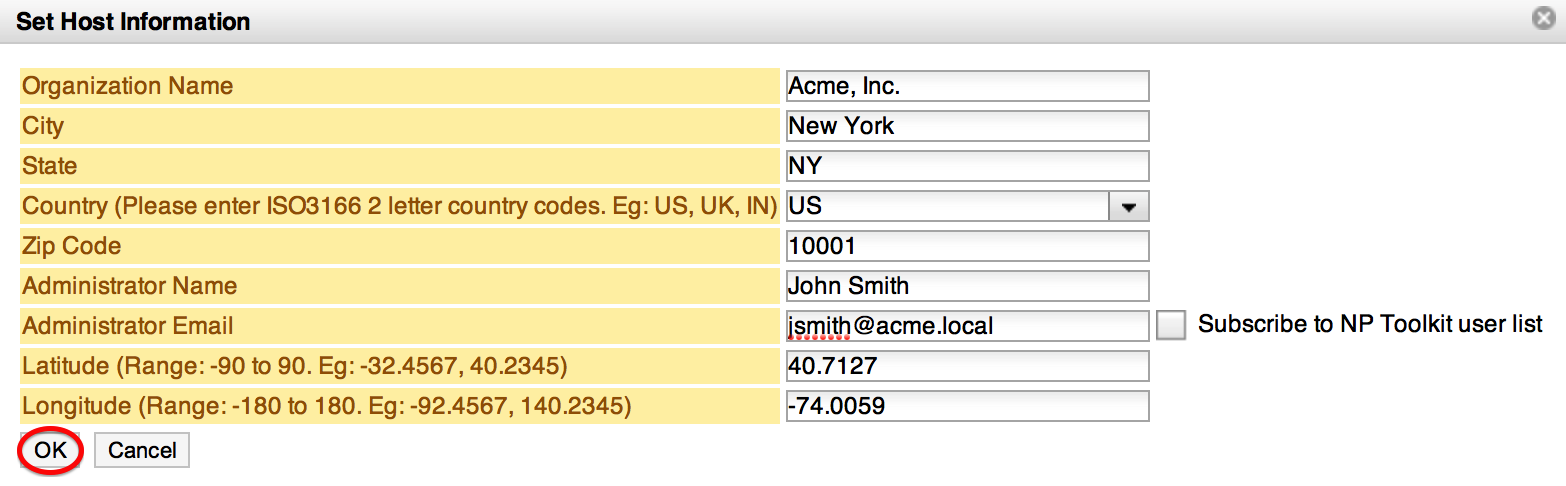
In the pompt that appears fill-in the fields presented. They are as follows:
- Organization Name
The name of the organization to which this host belongs
- City
The city where the host resides.
- State
The state, province or other country-specific region where the host resides. May be the 2-letter abbreviation if applicable.
- Country
The two-letter ISO 3166 country code where the host resides.
- Zip Code
The postal code of the location where the host resides
- Administrator Name
The full name of a person to contact about this host
- Administrator Email
The email address where correspondence regarding this host may be sent
- Latitude
The latitude of the host as a signed floating-point number between -90 and 90. Note that if you are in the southern hemisphere this value should be negative.
- Longitude
The longitude of the host as a signed floating-point number between -180 and 180. Note that if you are in the western hemisphere this value should be negative.
When you are done making changes click OK
Click Save to apply your changes
Communities are self-defined tags that can be used as a means to search for a host on the Global Services page. There are two ways to add a new community. One method is to add it manually by typing the community (note that communities are case-sensitive):
Under Communities This Host Participates In, click Add New Community

At the prompt, type in the community you want to add (case-sensitive) and click Add when done

Click Save to apply your changes
Alternatively you can add an existing community from the world cloud by doing the following:
Under Popular Communities, find the community you wish to add in the word cloud and click it

Click Save to apply your changes
You may remove your host from a particular community with the following steps:
Under Communities This Host Participates In, find the community you wish to remove and click Delete

Click Save to apply your changes